When one of my childcare parents asked me if I wanted some tile samples from her workplace I of course said yes – I wasn’t certain what I would use them for but I knew I’d find something. Removing all the tiles from the sample boards/books was a very long and difficult task but sorting and organizing them by size and colour was much more fun. If the tiles were not so breakable they would make wonderful loose parts just like that but with a mixed age group that includes infants and toddlers there are some safety concerns.
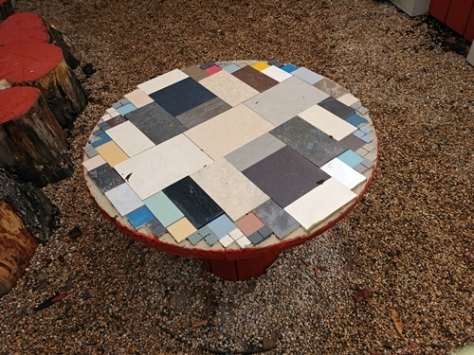
My first project didn’t involve the children – I glued some of the tiles on an old spool to create a table for our outdoor play space. This was done during my vacation as part of my most recent outdoor play space renovation.
Still, I also wanted to find a way that the children could use the tiles too. I decided that mosaic pictures or stepping stones for the garden would probably be the best choice. The majority of the tile samples were too large to use whole so I thought the children would like to help break them up. For a few hours on two consecutive summer days I sat in the yard breaking tiles while the children ran around fully engaged in other activities. I was a little surprised my invitation to smash stuff got no interest but I certainly wasn’t going to insist they stop what they were doing and join me.
Initially I planned to use cardboard trays as forms for cement ‘stones’ and let the children decorate them with the broken tile pieces – with direct supervision I thought even the youngest ones could do this. However, after reading cement making directions and calculating the amount of cement needed to fill each tray, I had doubts about being able to make enough cement to fill all the cardboard trays I had collected AND supervise children too.
I thought about how I had glued the tiles to the old wooden spool and decided that would be an easier way to do it. I cut cedar fence boards into squares to use as the base. Using cedar the finished ‘stones’ could be used outdoors for garden decorations or indoors if they preferred. Also, because the cedar squares were much smaller than the cardboard forms I originally planned to use there was a better chance the children would complete at least one.
There were many steps for this project so this allowed us to work on it over a long period of time. Not all the children worked on their creations at the same time but most of the work was done at quiet time when babies were sleeping. Ultimately, due to the sharp edges of the broken tiles and the toxicity of some of the supplies, I felt it was not a developmentally appropriate activity for the littlest ones even with direct supervision.
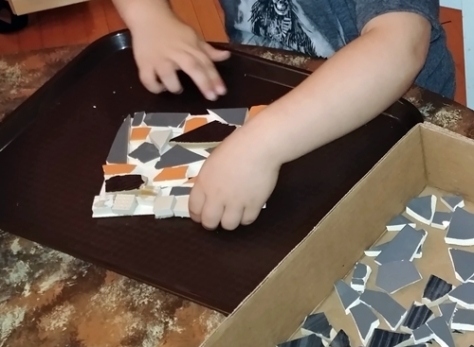
For the first step I provided each child with a cardboard base the same size as the cedar squares. They used this to dry fit the tile pieces taking as much time as they needed to choose and arrange tiles to create their designs.
When they were happy with their design I mixed floor leveler cement to use as an adhesive for the tiles. I had considered several adhesive options but decided on the floor leveler because;
- I had a bag of it already because I’ve used it on my home floors
- I pretested it on the cedar & tiles and it worked very well
- I can mix it in small batches as needed
- It dries quickly (maybe a little too quick)
- Cleanup is fairly easy
The next step was to put the cement on the cedar boards – the children enjoyed watching the wet cement flow across the board. No pictures of this as we had to work quickly at this point. Each child then had to transfer their pattern from the cardboard template to the cedar board before the cement dried.
Interestingly all three of the four-year-olds managed to complete this step with only a couple ‘extra’ pieces that didn’t fit on their boards. The school-age children were much slower, overthinking the process and trying to change their patterns. They ended up with many leftover pieces and some spaces where the cement dried before they could get any tiles on.
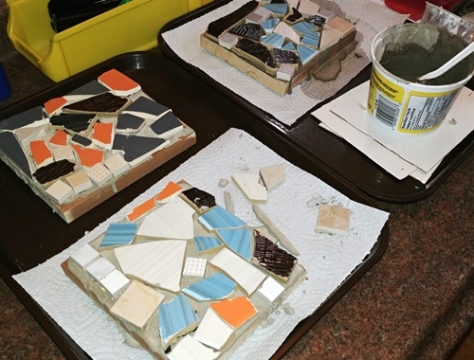
Now, when I originally planned this activity this would have been the finished product but although the floor leveler cement worked well to adhere the tiles to the boards, it wasn’t thick enough to cover the sharp edges of the broken tiles. If we had used thick concrete in cardboard forms we could have pushed the tile pieces in far enough that they would have been flush with the concrete surface. Alternatively, if the tiles had all had straight edges and been arranged close together then there wouldn’t have been large gaps.
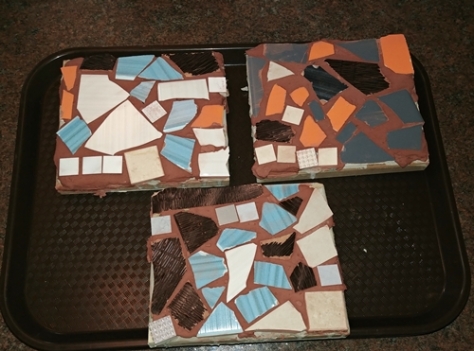
However, we did have large gaps and sharp edges and my solution was to use grout. Luckily, I had plenty on hand leftover from when I tiled the back splash in my kitchen. I mixed it in small batches and let the children spoon it into the gaps – I know, not proper grouting technique but it worked.
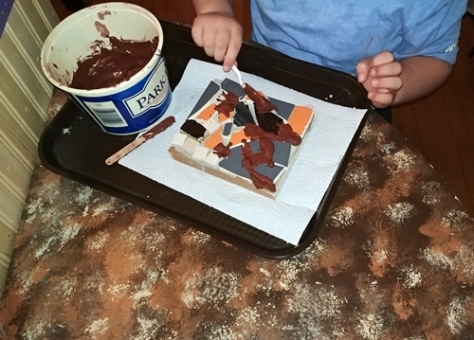
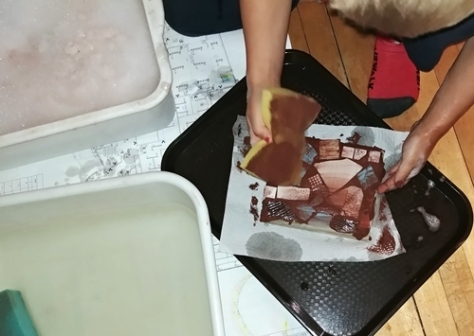
Then came the final step – washing off the extra grout. This proved to be everyone’s favourite step. In fact, now that I know how much these children LOVE using warm soapy water and sponges I have many more ‘projects’ planned for them 😉
This was a very long project – nearly six weeks from the time I first broke the tiles until the last child completed their mosaic board. Probably wouldn’t have take that long if we didn’t work on it only in small groups at quiet time and didn’t have to wait for things to dry between steps. Yet, those were some of the ‘special’ things about this project too.
Here are a few of the finished products;